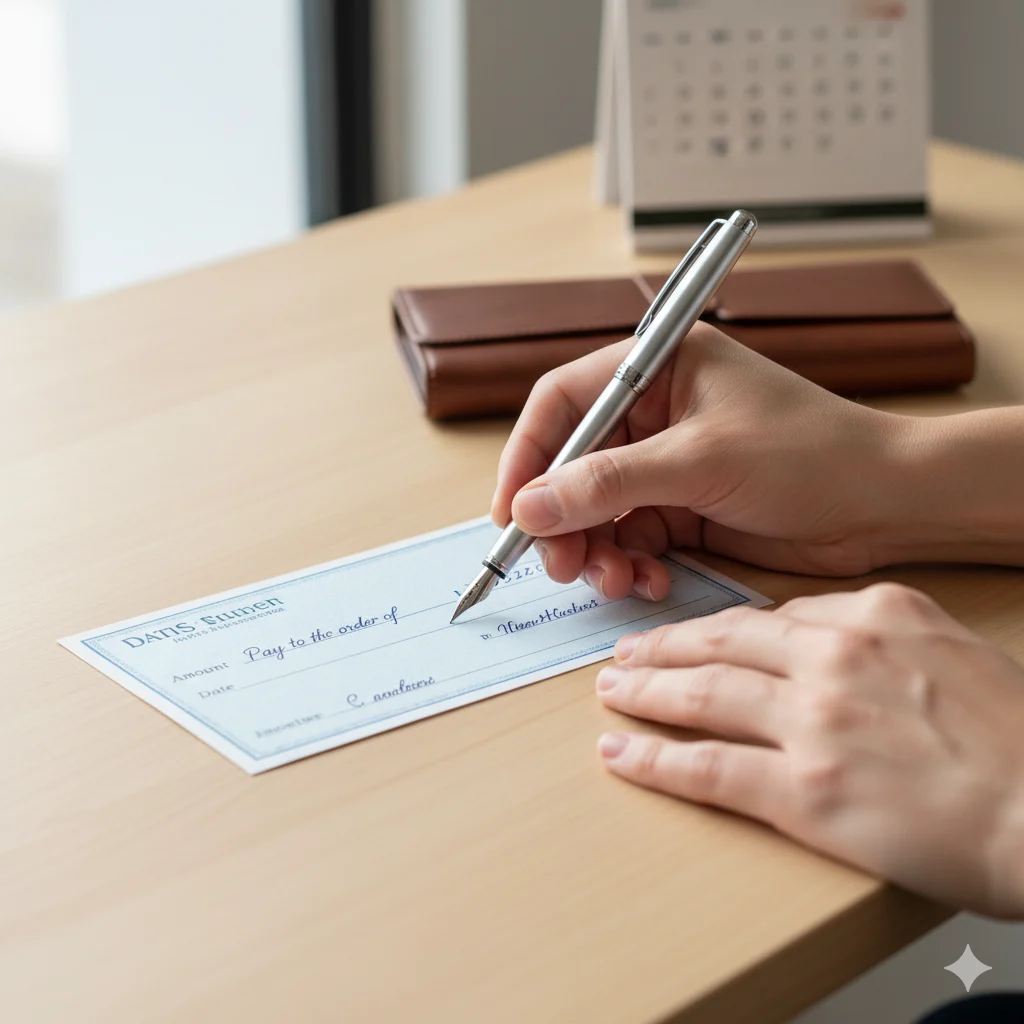
Even though we live in an age of online banking and digital wallets, there are still times when you need to write a check. Whether it’s paying your rent, settling a utility bill, or sending money to someone who doesn’t use online payment apps, learning how to write a check is a timeless financial skill everyone should know.
For many people, writing a check seems confusing — lines, boxes, and signatures can feel intimidating if you’ve never done it before. But the truth is, it’s simple once you understand what each part means and how to fill it in correctly. This guide will show you the easy way to write a check, even if you’re a complete beginner.
Why It’s Still Important to Know How to Write a Check
In today’s fast-moving digital world, checks might seem outdated, but they still hold value for personal and professional payments. Many landlords, organizations, and small businesses prefer paper checks because they provide a clear record and signature verification.
Learning how to write a check properly helps you:
- Maintain accurate financial records.
- Make secure payments when digital options aren’t available.
- Appear professional in formal transactions.
- Avoid delays and errors caused by incorrect information.
Even as technology evolves, understanding the basics of check writing shows responsibility and financial literacy — skills that will serve you for life.
Understanding the Parts of a Check
Before writing your first check, let’s understand what each section means. Every part of a check serves a purpose:
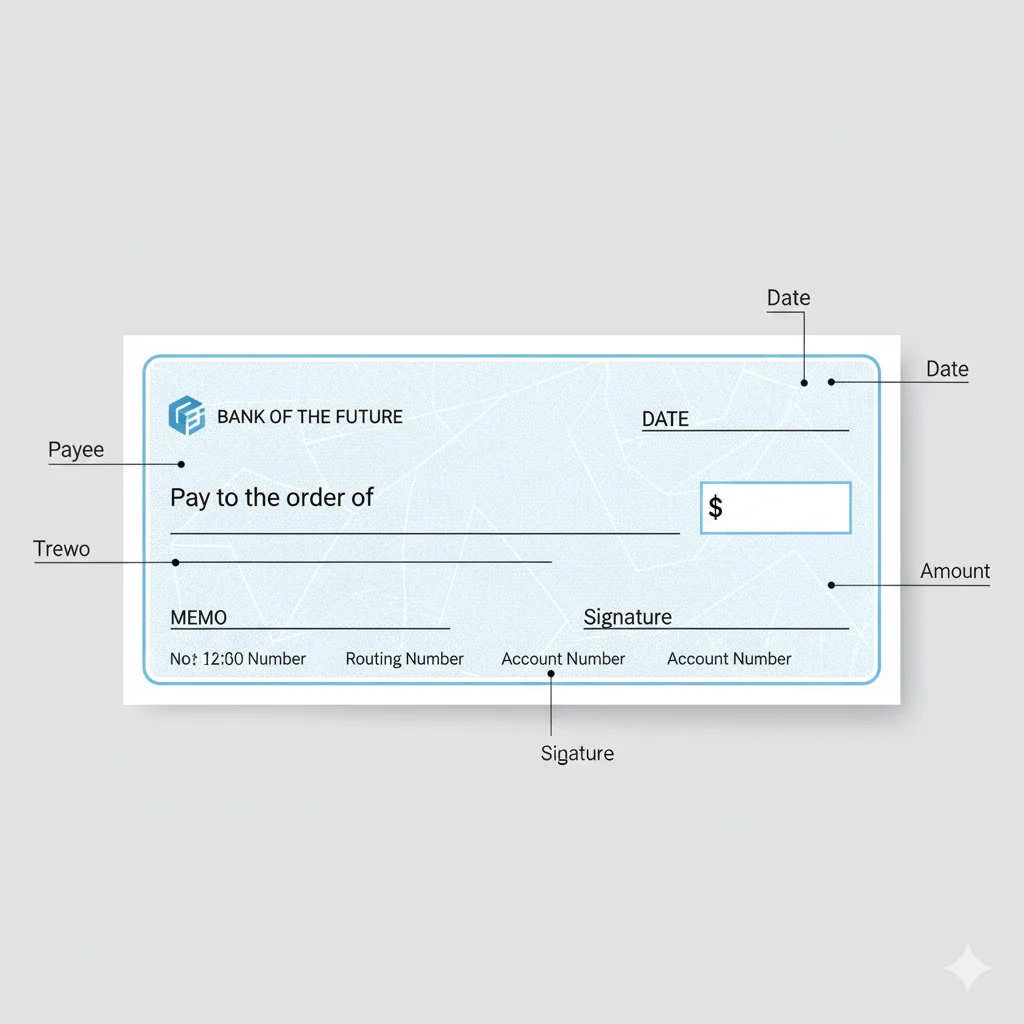
- Date Line: Where you write the date you are issuing the check.
- Payee Line: The section labeled “Pay to the order of” where you write the name of the person or company you’re paying.
- Amount Box: The small box where you write the amount in numbers.
- Amount Line: The long line below the payee line where you write the amount in words.
- Memo Line: A short note describing what the check is for (optional).
- Signature Line: Where you sign to authorize the bank to process the check.
- Routing and Account Numbers: Printed at the bottom to identify your bank and your account.
Knowing these sections will make filling out a check feel completely natural.
How to Write a Check Step-by-Step
Writing a check is simple once you know the order. Follow these steps carefully:
Step 1: Write the Date
In the top right corner, write today’s date or a future date if you want the check cashed later (known as post-dating).
Example formats:
- October 19, 2025
- 10/19/25
✔ Tip: Always use the current date unless you have a reason to delay cashing.
Step 2: Write the Payee’s Name
On the line that says “Pay to the order of”, write the name of the person or business receiving the payment.
Example:
Pay to the order of Daniel Smith
Pay to the order of Sunrise Apartments
Make sure the name is spelled correctly. Mistakes can cause bank rejections.
Step 3: Write the Amount in Numbers
In the small box with the dollar sign ($), write the exact amount of money. Include dollars and cents.
Example:
$325.75
Start the number close to the left edge of the box to prevent anyone from adding extra digits.
Step 4: Write the Amount in Words
On the line below the payee, write the same amount in words. This confirms the number written in the box.
Example:
Three hundred twenty-five and 75/100 dollars
If the amount is a whole dollar amount, write:
Three hundred twenty-five dollars and no/100
Draw a straight line through any remaining space to prevent tampering.
Step 5: Write a Memo (Optional)
The memo line helps you remember the purpose of the check or provides information to the recipient.
Examples:
Rent for October
Invoice #2025
Gift
While optional, it’s a good habit to fill this line for record-keeping.
Step 6: Sign Your Name
At the bottom right corner, sign your name exactly as it appears on your bank account. This signature gives permission to withdraw funds.
✔ Tip: Always use the same signature for consistency. Checks without a signature cannot be processed.
Step 7: Record It in Your Checkbook
After writing the check, record the details — check number, date, payee, and amount — in your check register.
This helps track your spending and avoid overdrafts.
Keeping accurate records is one of the most important habits in personal finance.
Example of a Properly Written Check
Let’s say you’re paying your internet bill of $60.25 to “NetConnect Services.”
Here’s how your check should look:
- Date: October 19, 2025
- Pay to the order of: NetConnect Services
- Amount box: $60.25
- Amount in words: Sixty and 25/100 dollars
- Memo: Internet bill – October
- Signature: Your usual signature
Simple, clean, and professional.
Common Mistakes to Avoid When Writing a Check
Even small mistakes can cause big problems. Avoid these common check-writing errors:
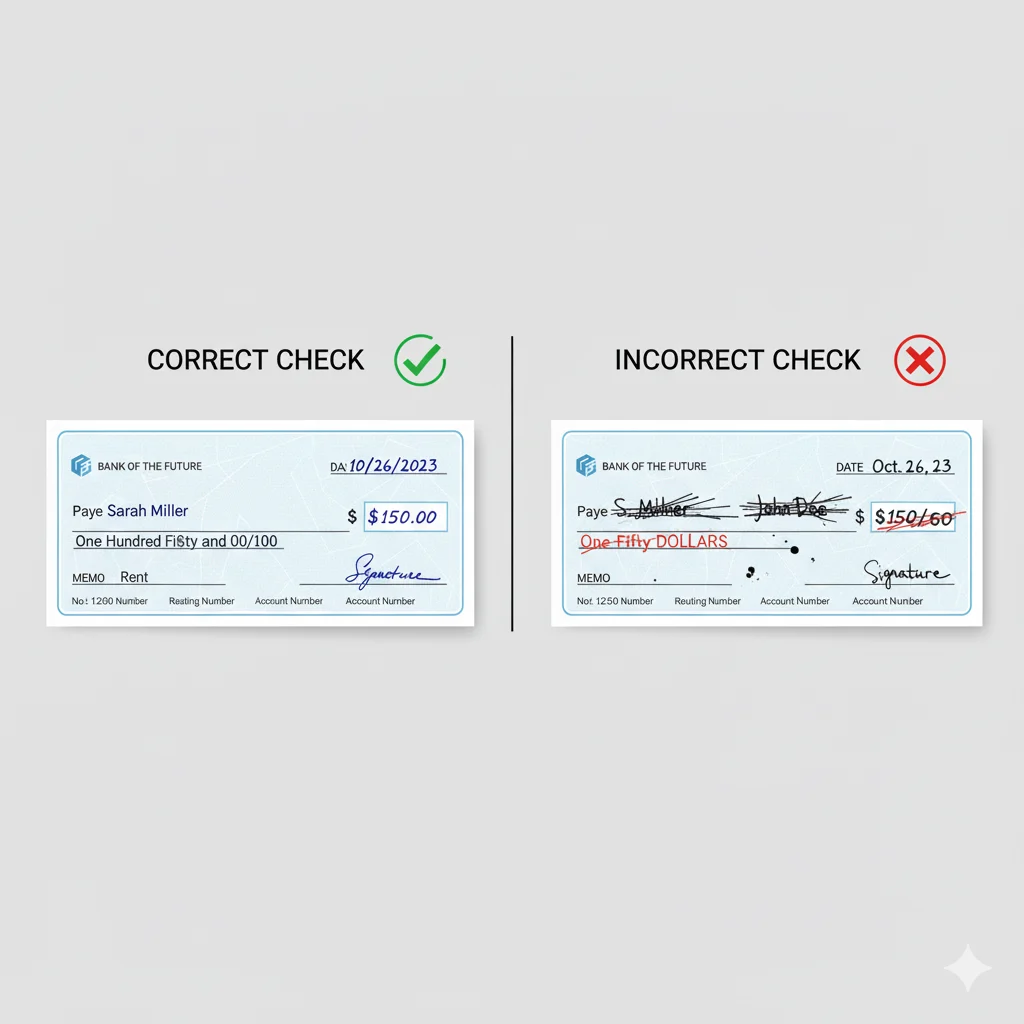
- Leaving blank spaces on the amount line.
- Forgetting your signature.
- Writing different amounts in numbers and words.
- Misspelling the payee’s name.
- Using pencil or erasable ink.
- Failing to record the transaction in your checkbook.
Each check you write represents a financial agreement — precision and clarity matter.
Safety Tips for Writing Checks
Writing checks safely helps protect you from fraud or misuse. Follow these safety practices:
- Use blue or black permanent ink only.
- Never sign a blank check.
- Store unused checks securely.
- Avoid writing sensitive details in the memo line (like account numbers).
- Track check numbers and keep receipts.
- Review your bank statements regularly to confirm cleared checks.
If you suspect a check has been lost or stolen, immediately contact your bank to request a stop payment.
How to Void a Check Correctly
Sometimes you may need to void a check — for example, when setting up direct deposits or if you make a mistake.
Here’s how:
- Write the word VOID in large letters across the check.
- Avoid covering the routing and account numbers if the check is for verification purposes.
- Record the check number and reason for voiding in your register.
Voiding a check correctly ensures it cannot be fraudulently used.
What to Do If You Make a Mistake
If you make an error in the amount or payee line, don’t try to scratch it out or overwrite.
Simply write “VOID” across the check, record it, and start a new one.
It’s safer to void a check than risk a bank rejecting or misprocessing it.
How Banks Process a Check
Once the payee deposits your check, their bank sends the details electronically to your bank.
Your bank verifies your signature, checks your balance, and then transfers the amount to the recipient.
Processing time is typically one to three business days. Keeping a record ensures you always know when the funds leave your account.
Writing Business Checks Professionally
If you’re writing checks for a business, professionalism matters.
Here’s how to do it right:
- Use checks with your company name printed.
- Include a clear memo line (invoice number, project name, etc.).
- Keep business checks separate from personal ones.
- Record all payments in accounting software.
Accurate business check writing builds credibility and trust with clients and vendors.
Why Checks Still Matter in the Digital Age
While mobile apps and e-payments are convenient, checks remain useful for transactions that require physical proof or signatures.
They’re often required for:
- Legal and property payments.
- Donations or government forms.
- Traditional or corporate vendors.
Learning how to write a check for beginners ensures you’re never stuck when digital payments aren’t accepted.
A check may be old-fashioned — but it’s reliable, traceable, and professional.
Frequently Asked Questions (FAQs)
1. Can I write a check using pencil?
No. Always use permanent ink — pencil can be erased or altered, which makes your check invalid.
2. Can I write a check to myself?
Yes. You can write a check payable to yourself to transfer money between accounts.
3. How long does a check remain valid?
Most banks honor checks for up to six months from the date written.
4. What if I don’t have enough funds in my account?
Your check may “bounce,” and you could face bank fees or penalties. Always confirm your balance before writing.
5. Can I post-date a check?
Yes, but some banks process them immediately. Make sure you have funds available before issuing it.
6. What should I do if I lose a check?
Contact your bank right away to stop payment and note the check number in your register.
Conclusion
Learning how to write a check gives you confidence and control over your personal finances. It’s not just about filling in boxes — it’s about accuracy, professionalism, and responsibility.
Once you understand each part — the date, payee, amount, memo, and signature — writing a check becomes second nature. Whether you’re paying rent, handling business expenses, or sending a gift, a well-written check leaves a lasting impression of reliability and care.
Even as the world moves toward digital payments, this timeless skill ensures you’ll always know how to make a secure, verified, and respectful payment.