Taking a screenshot on a Chromebook is quick, simple, and doesn’t require any extra software. Whether you want to capture the entire screen, a specific window, or just a selected portion, Chrome OS gives you several built-in tools to do it efficiently.
This complete guide will walk you through how to take a screenshot on Chromebook, explain shortcut methods, and share easy tips for beginners to save and manage your images smoothly.
🧭 Understanding Chromebook Screenshot Options
Before jumping into shortcuts, it helps to know what kind of screenshots you can take on a Chromebook. Chrome OS provides three main capture options:
- Full-Screen Screenshot – Captures everything currently visible on your screen.
- Partial Screenshot – Lets you select the exact area you want to capture.
- Window Screenshot – Captures a single window only.
Each method uses a simple Chromebook screenshot shortcut, so once you’ve learned them, taking a screenshot becomes second nature.
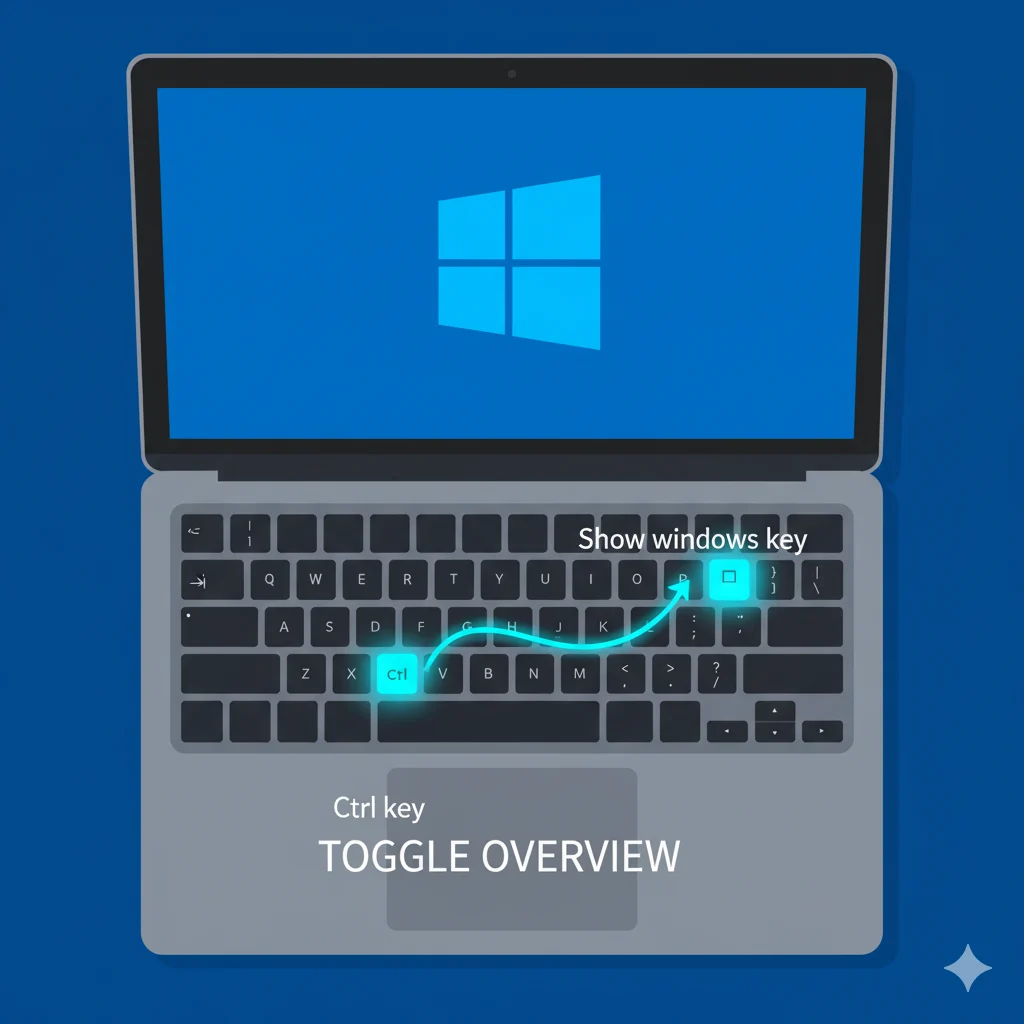
🪄 Method 1: How to Take a Full Screenshot on Chromebook
If you want to capture everything visible on your screen:

- Press Ctrl + Show Windows (the rectangle key with two lines).
- You’ll see a quick flash — that’s your screenshot being taken.
- The image will automatically save in the Downloads folder.
📁 Tip: Open the “Files” app and go to the “Downloads” section to find your screenshot.
✂️ Method 2: Capture a Partial Screenshot
Need just a portion of your screen? Here’s how:

- Press Ctrl + Shift + Show Windows.
- The screen will dim slightly, and your cursor turns into a crosshair.
- Click and drag to select the area you want to capture.
- Release the mouse — the selected part is saved automatically.
This is ideal for quick edits, cropped images, or focusing on a small section.
🪟 Method 3: Screenshot a Specific Window
To capture just one window (and not the entire screen):
- Press Ctrl + Alt + Show Windows.
- Hover your cursor over the window you want.
- Click on it — and Chrome OS saves that window as your screenshot.
This feature keeps your captures clean, avoiding unwanted parts of the screen.
📱 Method 4: How to Screenshot on a Chromebook Tablet
If you’re using a 2-in-1 Chromebook or tablet mode:
- Press Power + Volume Down together — just like on a smartphone.
- The screen will briefly flash, confirming the screenshot.
🖼️ The file automatically saves to your Downloads or Images folder.
🧰 Method 5: Use the Screen Capture Tool
Chrome OS also includes a built-in Screen Capture tool for even more control.
To access it:
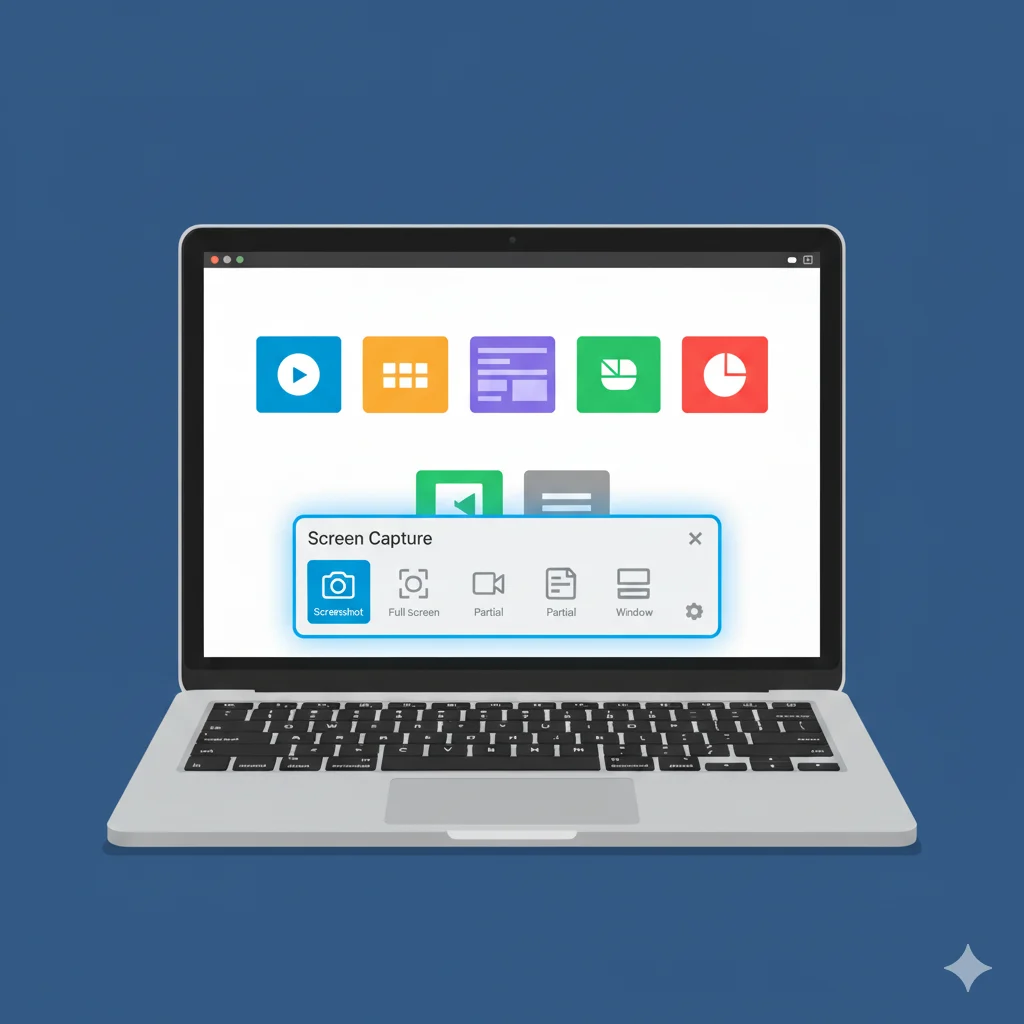
- Press Shift + Ctrl + Show Windows, or
- Click the clock area → select Screen Capture from the quick settings menu.
From here, you can:
- Switch between image or video recording.
- Choose full screen, window, or custom area.
- Save directly to your Downloads or Google Drive.
💡 Bonus: You can also record your screen using the same tool — perfect for tutorials or class projects.
🖼️ Where to Find and Edit Your Screenshots
After you take a screenshot on Chromebook:
- Find it in your Downloads folder.
- Open it in the Gallery app to crop, rotate, or add simple annotations.
- Rename or move it to Google Drive for cloud storage.
You can also drag the file into Docs, Slides, or Gmail — Chrome OS automatically attaches or embeds it.
⚙️ Troubleshooting Common Screenshot Issues
If your Chromebook doesn’t take screenshots:
- 🔋 Restart your device: Temporary bugs often fix after reboot.
- ⌨️ Check your keyboard: Some school Chromebooks disable shortcuts.
- ☁️ Low storage? Clear your Downloads folder to free space.
- 🔄 Update Chrome OS: Go to Settings → About Chrome OS → Check for updates.
🧩 Pro Tips for Better Screenshot Management
- Rename your files immediately for easy organization.
- Use Google Photos to sync and edit screenshots across devices.
- Press Ctrl + Shift + Show Windows, then choose “Settings” → “Capture Mode” for advanced controls.
These tips save time and make your Chromebook workflow smoother and more professional.
🏁 Conclusion
Learning how to screenshot on Chromebook is a small skill with big convenience. From quick notes to sharing tutorials or saving online receipts — Chrome OS makes it effortless.
Whether you’re a beginner or just switching from another device, mastering Chromebook screenshot shortcuts gives you complete control over how you capture, save, and share your screen.
Stay organized, explore the Screen Capture tool, and enjoy how simple Chrome OS makes every step.
💬 FAQs
Q1. Where do Chromebook screenshots go?
All screenshots automatically save in the Downloads folder by default.
Q2. Can I change where screenshots are saved?
Yes. Open the Screen Capture tool → Settings icon → Choose a different folder.
Q3. How do I screenshot on a school Chromebook?
If shortcuts don’t work, your administrator may have disabled them. Use the Screen Capture tool from Quick Settings instead.
Q4. Can I record my screen on a Chromebook?
Yes. Open the Screen Capture tool and switch from the camera icon to the video icon.
Q5. Why doesn’t my Chromebook take screenshots?
Try restarting the device or checking keyboard settings. If it’s a managed Chromebook, admin restrictions might be the cause.